
As a birth photographer, you have the incredible privilege of documenting one of the most meaningful moments in a family’s life – the birth of their child. Though an intimidating responsibility, birth photography can be immensely rewarding when done right. In this comprehensive guide, I’ll walk you through everything you need to know to start photographing births confidently.
Choosing the Right Gear for Birth Photography

Your camera gear plays a crucial role in your ability to get great birth photos. Here are a few key factors to consider when selecting equipment:
Use a Fast, Wide-Angle Lens
I highly recommend using a fast, wide-angle lens between 24-35mm. Birth rooms are small, so you’ll need a wide perspective. A fast aperture (f/2.8 or wider) allows you to shoot in low light. Some top choices are the Canon 24mm f/1.4L and Sigma 35mm f/1.4.
Have a Full Frame Camera
Full frame cameras like the Canon 5D Mark IV perform better in low light compared to crop sensor models. This allows you to use faster shutter speeds and lower ISOs.
Bring Backup Bodies and Lenses
Always have a backup camera and lens in case your primary gear fails. Nothing will ruin a birth shoot faster than dead camera batteries or a jammed lens.
Use a Continuous Lighting Source
Birth spaces are often dark, so bring a continuous lighting source like an LED panel. This allows you to add a pop of directional lighting when needed.
Use Noise-Reducing Accessories
Consider using a noise-reducing camera strap system and sound blimp or cage to dampen shutter clicks. This helps keep things quiet and peaceful.
How to Photograph the Different Stages of Labor

Capturing the emotion and details of childbirth requires knowing what to look for at each stage of labor. Here’s a quick overview:
Early Labor
- Capture feminine details like a pregnant belly, contractions monitors, mom braiding her hair, etc.
- Photograph sweet moments between mom and her partner – hand-holding, massage, laughter.
- Shoot wide scenes of the birthing suite to tell the story.
Active Labor
- Focus on mom’s expressions and emotions as contractions intensify.
- Photograph techniques for coping like massage, soaking in the tub, birth ball exercises.
- Capture transitional moments of intensity between contractions.
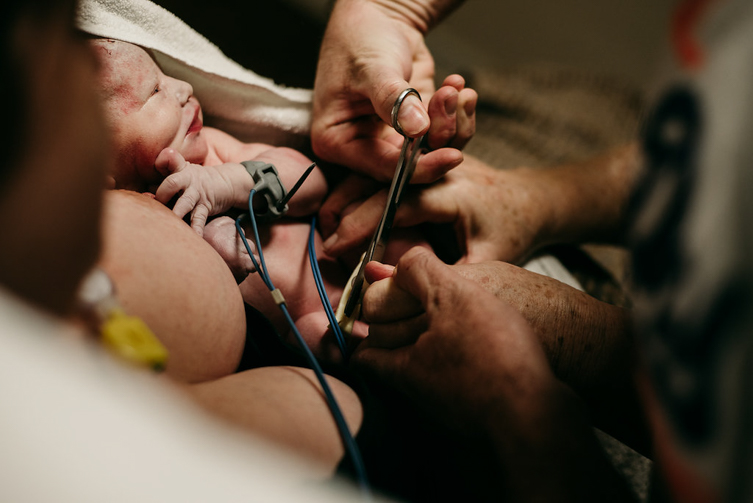
Delivery
- Use fast shutter speeds to freeze the action as baby crowns and is delivered.
- Show the emotions on mom’s face as she meets her baby.
- Photograph details like baby’s first cry, umbilical cord being cut, etc.
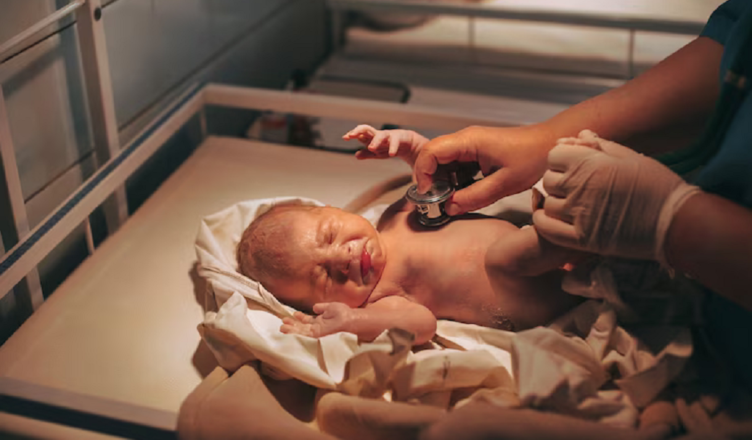
Immediately After Birth
- Get wide shots of mom’s beaming smile and initial skin-to-skin contact.
- Focus on precious details like baby’s tiny fingers and toes.
- Capture the first family photo and reactions of siblings meeting baby.
10 Tips for Taking Stunning Birth Photos
Beyond having the right gear, some key techniques will elevate your birth photography:
1. Get Low and Shoot Wide
Getting as close to mom’s level as possible creates more intimate, emotional shots. Shoot wide to show context.
2. Watch for Gorgeous Natural Light
Keep an eye out for beautiful window light streaming into the birth suite. Use it to backlight tender moments.
3. Capture Authentic Emotion
Be ready for real moments like tears of joy and expressions of triumph after birth. These make the best photos!
4. Focus on Details
Don’t forget tight details like baby’s tiny fingers curled around mom’s. These add depth to your storytelling.
5. Embrace Creative Angles
Don’t be afraid to photograph from creative positions – like directly above mom to show perspective.
6. Shoot During Contractions
Contractions bring heightened emotion. Capture mom’s expressions and the medical team in action.
7. Use Gentle Direction
Provide subtle direction to moms for more flattering, authentic poses when appropriate.
8. Work Quickly But Calmly
Birth moves fast, so work quickly to optimize lighting and moments, but move in a calm manner.
9. Show Medical Elements
Keep medical elements like oxygen masks, epidurals, and blood in frame to document the rawness of birth.
10. Collaborate with Nurses
Talk with nurses beforehand about your approach and collaborate on optimal positions for photos.
How to Get Pin-Sharp Images in Low Light
The low lighting of birth suites makes getting sharp, well-exposed photos difficult. Here are some tips:
- Use the widest aperture possible (f/1.4-2.8). This maximizes light intake.
- Push your ISO. Birth photos call for ISO 1600-6400 to allow fast shutter speeds.
- Add supplemental lighting like an LED panel or bounce flash when possible.
- Use post-production sharpening carefully. Too much looks unnatural.
- Choose high-quality lenses that excel in low light, like the Canon 85mm f/1.2L.
- When possible, have dad help redirect medical lights onto mom for illumination.
- Avoid extreme cropping during editing. It will make photos look soft and pixelated.
How to Promote Emotion and Connection During the Shoot

As the birth photographer, you play an important role in facilitating meaningful connections:
- Have an initial consultation call with the family beforehand to establish rapport.
- During labor, have dad help provide comfort measures for mom so they connect.
- Give gentle encouragement to mom when she needs a boost through contractions.
- Suggest special moments like looking into one another’s eyes and holding hands.
- After delivery, allow time for extended skin-to-skin contact and falling in love.
- Pose dad with one hand on mom and other hand on baby for an “anchoring” shot.
- Whisper direction in mom’s ear gently if needed rather than speaking loudly.
- Show raw emotion yourself through happy tears and celebrate their triumph!
Best Poses for Birth Photos
Posing during the intensity of labor can be challenging. Here are 5 go-to birth poses to try:
1. The Embrace
Have mom seated with arms wrapped around a birthing ball. Dad sits behind embracing her. This shows their teamwork.
2. Connection Gaze
Mom reclines with baby on her chest immediately after birth. Have her look down with adoring eye contact.
3. The Presentation
After delivery, place baby on mom’s chest with her hands cradling underneath to present the new arrival.
4. Curling Inward
During contractions, have mom pull her legs in tight with arms wrapped around them. This shows intensity.
5. The First Family
Once mom is ready after birth, gather her, dad and baby for a meaningful first family photo.
What to Wear While Photographing Birth

Make sure your attire doesn’t hinder your ability to document those precious moments:
- Wear extremely flexible clothing that allows you to squat and stretch easily. Yoga pants are perfect.
- Avoid anything that could brush against sterile areas like loose shirts or jewelry. Keep it fitted.
- Make sure clothes allow you to move quickly and fluidly to reposition.
- Wear quiet, non-slip shoes. Sneakers are ideal.
- Pull back long hair so it doesn’t swing forward as you bend over.
- Skip the perfume or scented lotions as newborns are sensitive.
- Bring a backup shirt in case yours gets wet or dirty during the shoot.
Helpful Methods for Posing During Labor
Posing moms during late stage labor can be challenging. Here are some helpful techniques:
- Have mom brace against the bed or partner during contractions rather than going limp. It creates tension.
-Suggest subtle movement like looking down or taking deep breaths. Too much can seem staged.
- Go with the flow if mom is being spontaneous rather than overly posing. Those images will be authentic.
- Avoid overly sexualized or stylized posing as that doesn’t match the raw nature of birth.
- Gently guide mom’s limbs into flattering positions when contractions subside.
- Whisper posing ideas into her ear so you don’t distract from the moment.
- Keep eyes soft and mouth relaxed rather than pulling big smiles during contractions.
How to Use Lighting Effectively
Lighting can make or break your birth photos. Follow these tips:
Bounce Flash
Bouncing your flash off ceilings or walls adds a subtle pop of light. This is especially useful when mom and baby first meet.
Window Light
Look for sun streaming into the room. Use it as a hair or rim light to outline your subjects beautifully.
Overhead Room Lights
While harsh, overhead medical lights can help when aimed at mom. Have dad help angle them.
LED Panel
An LED panel like those from Lume Cube gives continuous, adjustable fill lighting anywhere you need it.
Ask the Nurse
Politely ask the nurse to position any track lighting or overhead surgical lights onto mom for better illumination when possible.
Silhouettes
When light is too dim for exposure, use window backlighting to create an artistic silhouette effect.
10 Tips for Photographing the Delivery
Here are pointers to help you nail those fast-paced delivery shots:
1. Prepare and Position Yourself
Know your angles and settings beforehand. Prefocus if possible.
2. Shoot in High Speed Burst Mode
Capture fleeting moments by firing shots in rapid succession.
3. Show Emotion
Watch for powerful reactions on mom and dad’s faces.
4. Use Fast Shutter Speeds
Freeze the motion by shooting at 1/500th second or faster.
5. Change Perspectives
Shift your vantage point from the end of the bed to over mom’s shoulder.
6. Zoom In On Details
Isolate details like baby’s fingers stretching.
7. Watch the Angles
Avoid shooting directly up mom’s gown. Find more flattering perspectives.
8. Turn Down Your LCD
So it’s not distracting in the heat of the moment. Chimp later.
9. Back Off When Needed
If things get stressful, give the medical team space to work.
10. Be Unobtrusive
Work around the busy environment discreetly. Don’t impede staff.
How to Photograph Family Reactions
Capturing the reactions of siblings, grandparents and other family are priceless. Here are some ideas:
- Have the big brother or sister ready to meet baby right after delivery rather than waiting until later when the excitement has faded.
- Capture the anticipation and excitement on faces right as baby is announced.
- Show unbridled emotion, both happy and sad tears during the initial meeting. Authenticity makes the best photos.
- Photograph grandparents video chatting with the new baby and parents from outside the room when appropriate.
- If the birth is via c-section, prepare a stool on the side of the drape so baby can be lifted over for immediate contact.
- Take wide shots showing the whole room congratulating and fawning over baby.
- Ask the partner to photograph your reactions too so you become part of the storytelling.
How to Design a Beautiful Birth Photography Album
A well-designed album tells the moving story of baby’s birth day. Here are my album design tips:
1. Choose an Emotional Cover Image
Select a strong black and white or sepia toned shot of mom’s expression immediately after birth.
2. Arrange Chronologically
Take viewers through your images from start to finish to build suspense.
3. Mix Framed and Full Bleed
Use a mix of framed shots and full bleed images for visual interest.
4. Incorporate Bold Text
Use block style text of key words and phrases to accent your imagery.
5. Include Wide Hospital Shots
Establish setting and context by showing the birth space.
6. Focus on Storytelling
Curate your best images into a compelling narrative flow.
7. Show Details
Macro shots of tiny fingers and toes give an “ahhh” effect.
8. Print Large
Go big with 12×12 or larger pages so details stand out.
9. Get Input from Family
Get their feedback on photo selection and make revisions based on their preferences.
10. Handle Books Gently
Use clean hands and gloves when designing albums to keep pages pristine.
5 Key Steps for Editing Birth Photos
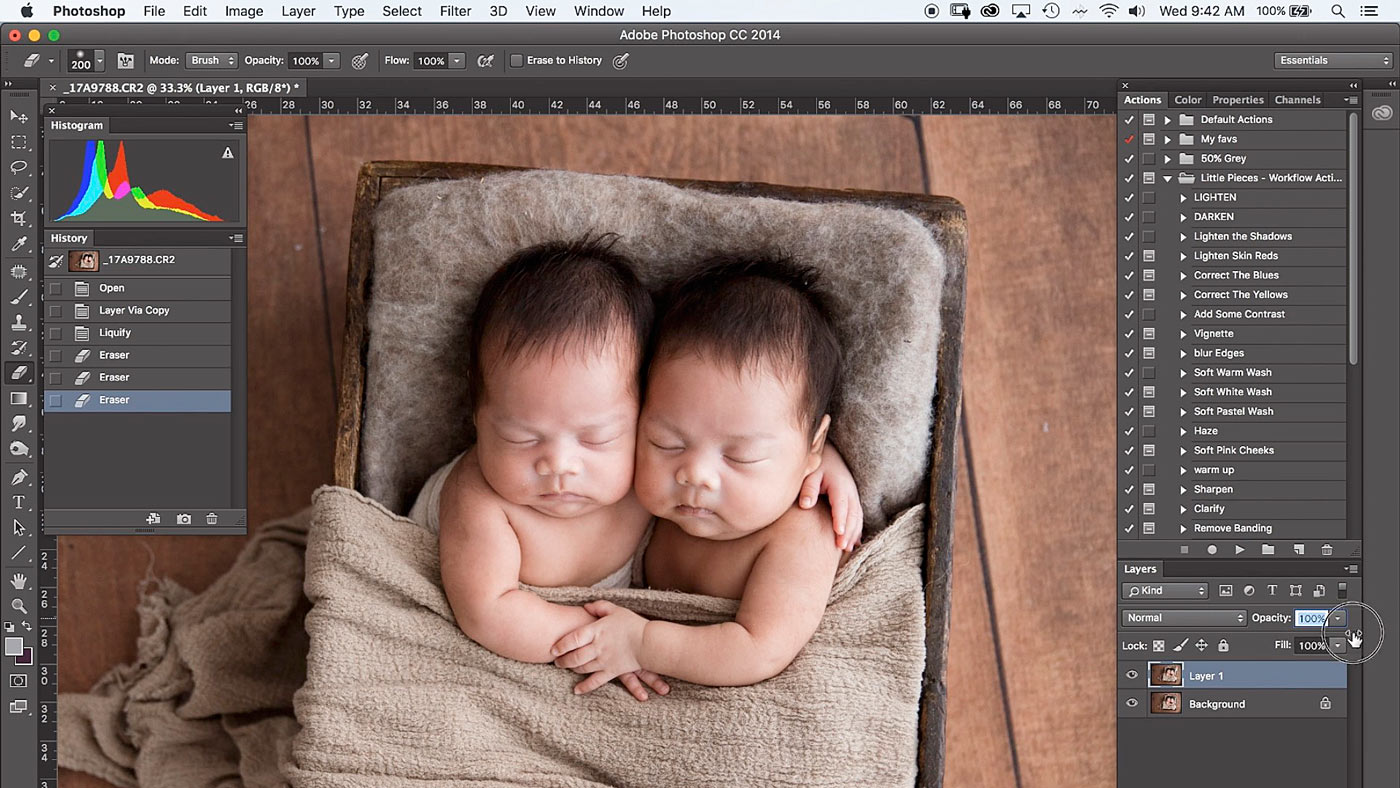
Here is an overview of my workflow for editing birth images in programs like Lightroom:
1. Cull Selectively
Carefully curate only your best images so you don’t waste time editing mediocre shots.
2. Correct Color and Exposure
Use the exposure, contrast, white balance and saturation sliders for balanced lighting.
3. Enhance Eyes and Skin
Brighten eyes and smooth skin lightly for a flattering effect.
4. Add Light Black and White Vignetting
Subtle darkened edges draws the viewer’s eye inward.
5. Fine Tune Your Favorites
Do more intensive retouching selectively on your hero shots.
How to Create a Cohesive Collection
With so many great shots, editing down can be hard! Here are tips for creating a cohesive final collection:
- Start by identifying your 3-5 absolute favorite images. Build your story around these hero shots.
- Look for a balance of wide/establishing shots, details, and emotional portraits. Variety adds interest.
- Cull repetitious frames. As amazing as that moment was, you don’t need 15 nearly identical shots of it.
- Be ruthless. Some great photos just don’t fit the overall storyline so they have to go.
- Order your images so the collection builds momentum, saving your best for last.
- Review the images in black and white. Strong shots look great even without color.
- Make sure your selections have a consistent style and editing for visual harmony.
Pricing Your Birth Photography Packages
When determining pricing, factor in:
- Length of coverage – Most births last 4-12 hours which requires an entire day from the photographer.
- Specialized skills – There is a premium price for expertise in high pressure birth situations and low lighting.
- Artistic ability – Strong creative vision and storytelling ability command higher pricing.
- Expenses – Gear depreciation, insurance, editing software, album materials all add up.
- The immense value of the images to families. This once-in-a-lifetime event can’t be recreated.
In light of these considerations, most professional birth photographers charge between $2000-$5000 to fully capture this monumental life milestone.
Frequently Asked Questions
1. Can the flash be distracting during birth?
Flashes can be distracting, so I use them minimally. For important shots, I bounce the flash to disperse it or use an LED panel instead.
2. How many photos will I deliver?
My clients receive around 150 professionally edited images. I cull extensively from 600-800 shots taken to tell a cohesive story.
3. Do you shoot underwater births?
While challenging, I have waterproof gear to accommodate underwater tub births. Special precautions are taken to protect my equipment.
4. How do you work around medical staff?
I communicate ahead of time to stay out of the way in emergencies. In normal situations I shoot around personnel discreetly.
5. Is there anything you won’t photograph?
Client preferences are top priority. I’ll omit certain medical elements if desired and avoid graphic close-ups during delivery.
In Summary
Photographing the awe-inspiring process of childbirth is no easy task, but immensely fulfilling. With the right approach, gear and techniques, birth photographers play an invaluable role in providing families with once-in-a-lifetime images during those precious first moments when life begins anew. In photography contrast refers to the variation in tones between the light and dark areas of an image, creating visual interest and emphasizing details; always approach your work with professionalism, capture genuine emotions unobtrusively, flatter your subjects, and skillfully enhance low lighting to immortalize the fleeting magic of birth in images destined to be cherished across generations.