
Are you captivated by the beauty of the great outdoors, especially during the magical hours of dawn and dusk? If so, you’re not alone. Many of us find solace and inspiration in the serene landscapes that Mother Nature paints with her brush of light. If you’re looking to capture these awe-inspiring moments and share them with the world, you’ve come to the right place. In this comprehensive guide, I’ll walk you through the art of landscape lighting photography, helping you take perfect pictures that truly reflect the wonder of the natural world.
Understanding Landscape Lighting
Before we dive into the nitty-gritty of how to take stunning landscape lighting pictures, it’s crucial to understand the essence of landscape lighting itself. Picture this: the sun is just about to dip below the horizon, casting a warm, golden glow across the landscape. Or maybe it’s the tranquil blue light of dawn slowly illuminating the world. These are the moments that can elevate a simple photograph into a breathtaking work of art.
The Golden Hour
One of the most coveted times for landscape photographers is the golden hour, which occurs during the first hour after sunrise and the last hour before sunset. During this period, the sun’s angle produces soft, diffused light that bathes the landscape in a warm, inviting glow. The colors are rich and saturated, shadows are long and soft, and everything seems to come to life.
The Blue Hour
The blue hour, on the other hand, is a magical time that takes place shortly before sunrise and after sunset. It’s named for the deep, cool, and almost surreal blue hues that dominated the sky during this period. The soft, even lighting of the blue hour is perfect for capturing a sense of tranquility and mystery in your landscape shots.
Essential Gear for Landscape Lighting Photography
Now that we’ve explored the magic of landscape lighting, let’s talk about the gear you’ll need to capture it effectively. While you don’t need to break the bank, having the right equipment can make a world of difference in your photography.
1. Camera

The most critical piece of gear for landscape lighting photography is, of course, your camera. While high-end DSLRs and mirrorless cameras offer the best image quality and flexibility, don’t feel discouraged if you have a basic digital camera or even a smartphone. These days, many smartphones are equipped with excellent cameras that can produce stunning results.
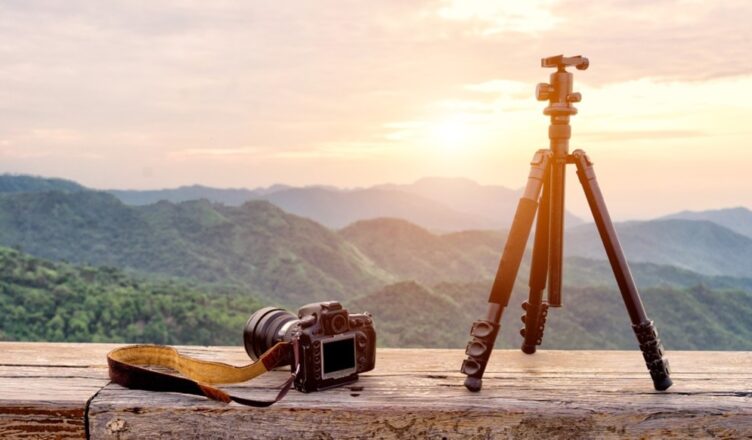
2. Tripod
A sturdy tripod is your best friend when it comes to landscape photography. It allows you to keep your camera perfectly still, ensuring sharp and clear images. Look for a tripod that’s easy to carry and set up, as you’ll likely be traveling to different locations.
3. Lenses
If you’re using an interchangeable lens camera, consider investing in a wide-angle lens. Wide-angle lenses are ideal for capturing expansive landscapes and can create a sense of depth and grandeur in your photos. Don’t forget to clean your lenses regularly to avoid unwanted smudges or dust affecting your shots.
4. Filters
Filters can be game-changers in landscape lighting photography. A polarizing filter can reduce reflections and enhance the colors in your images, while a neutral density (ND) filter helps control the amount of light entering your lens, allowing for longer exposures. Graduated ND filters are especially handy for balancing the exposure between the bright sky and the darker foreground.
5. Remote Shutter Release
To eliminate any camera shake when taking long-exposure shots, consider using a remote shutter release or an intervalometer. This handy accessory allows you to trigger your camera without physically touching it.
Finding the Perfect Location
Now that you’ve got your gear ready, it’s time to scout for the perfect location. Finding a picturesque spot is key to capturing stunning landscape lighting pictures. Here’s how to do it:
1. Research
Start by researching potential locations in your area or the area you plan to visit. Use online resources, photography forums, and social media to discover places that other photographers have found captivating. Pay attention to the time of day when these photos were taken to get a sense of the lighting conditions.
2. Visit During Daylight

Once you’ve identified a potential location, visit it during daylight hours. This allows you to explore the area, identify interesting compositions, and scout for potential hazards or obstacles that might impede your photography later on.
3. Timing is Everything
To capture the best lighting conditions, plan your shoot around the golden hour or blue hour, depending on the mood you want to convey in your photos. Apps like Golden Hour and PhotoPills can help you determine the exact timing based on your location.
4. Check the Weather
Keep an eye on the weather forecast. While dramatic weather can add an extra layer of interest to your photos, clear skies during the golden hour or blue hour can also result in stunning images. Be prepared for changing conditions, and don’t be afraid to reschedule if the weather isn’t cooperating.
Composing Your Shots
Composition plays a crucial role in landscape lighting photography. It’s not just about pointing and shooting; it’s about telling a story through your images. Here are some composition tips to keep in mind:
1. Rule of Thirds
The rule of thirds is a fundamental principle of composition. Imagine breaking your frame into nine equal parts by drawing two horizontal and two vertical lines. The intersection points of these lines are where you should place your main subjects or points of interest. This creates a balanced and visually pleasing composition.
2. Leading Lines
Use natural or man-made lines, such as rivers, roads, or trails, to guide the viewer’s eye into the frame. Leading lines can add depth and draw attention to your subject.
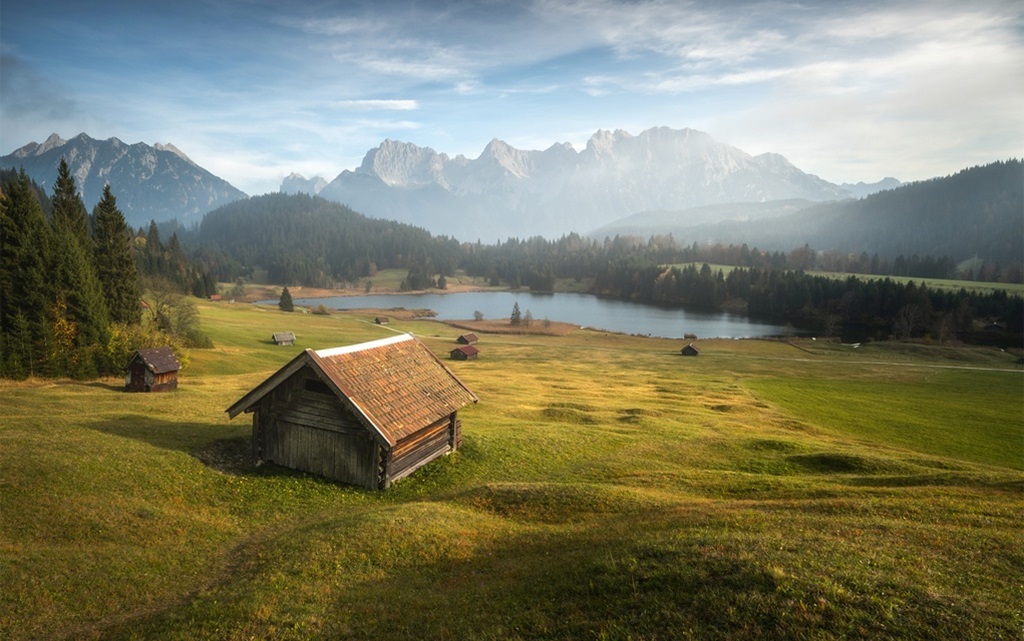
3. Foreground Interest
Incorporate interesting foreground elements, like rocks, flowers, or trees, to create a sense of depth and scale in your photos. This technique can make your images more engaging and immersive.
4. Framing
Frame your subject with elements from the environment, such as overhanging branches or rock formations. This adds context and draws the viewer’s eye toward the main subject.
5. Symmetry and Reflections
Capture symmetry and reflections when you can. Calm bodies of water can provide mirror-like reflections that enhance the visual impact of your images.
Mastering Exposure
Proper exposure is vital in landscape lighting photography, as it directly affects the mood and quality of your photos. Here’s how to get it right:
1. Use Manual Mode
While modern cameras have excellent automatic modes, switching to manual mode gives you complete control over exposure settings. This is especially important for landscape lighting photography.
2. Adjust Your Aperture
Start by selecting a small aperture (high f-number) like f/11 or f/16. This will give you a larger depth of field, ensuring that both the foreground and background are in focus.
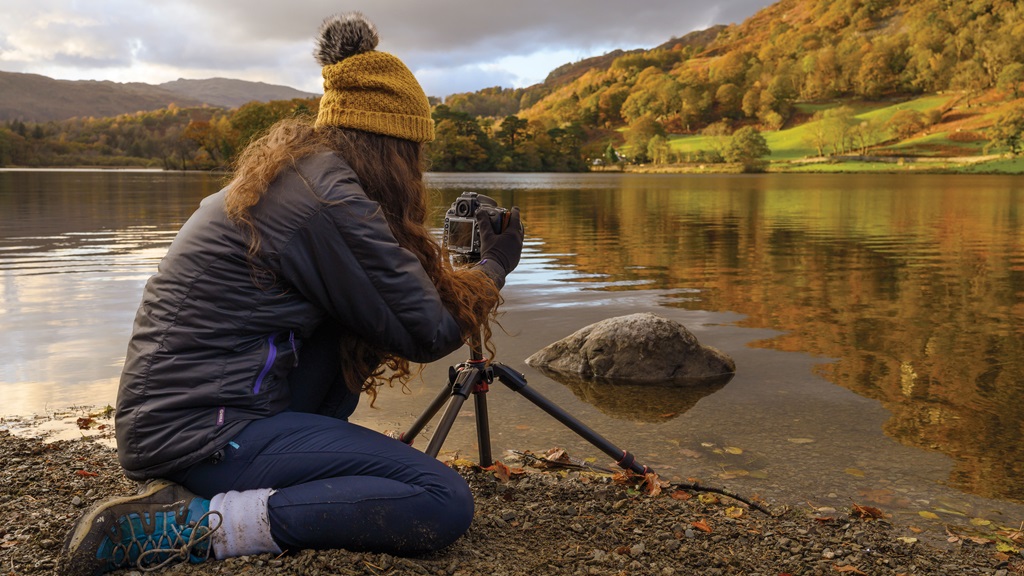
3. Shutter Speed
During the golden hour or blue hour, you’ll likely be working with lower light levels. Use a slow shutter speed to allow more light into your camera. To avoid a camera shake, use a tripod and a remote shutter release.
4. ISO Settings
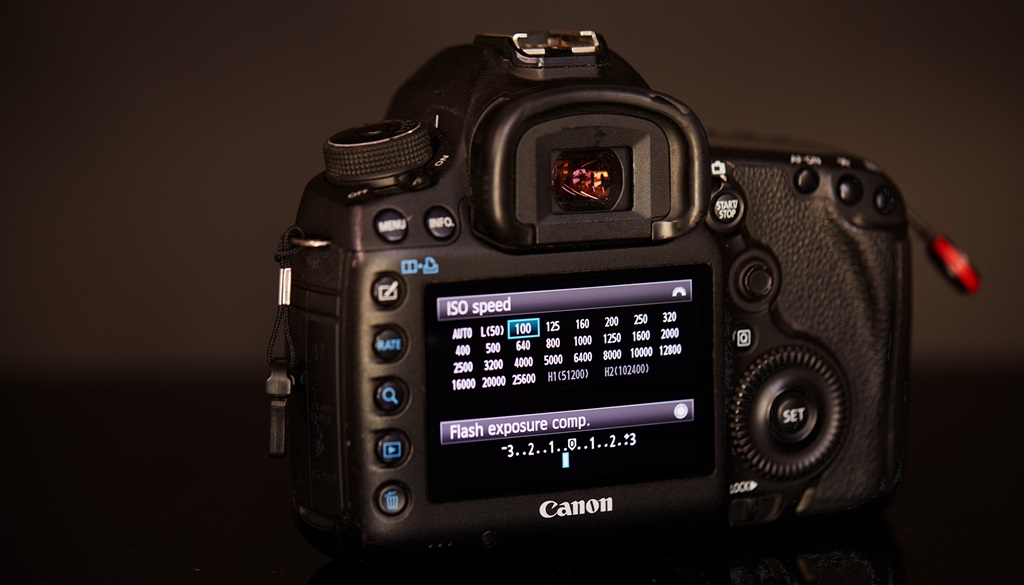
Keep your ISO as low as possible (usually 100 or 200) to minimize noise in your images. Only increase the ISO if you need to compensate for low light conditions.
5. Bracketing
Consider using exposure bracketing to capture a range of exposures. This can be especially useful in high-contrast situations, allowing you to blend multiple exposures in post-processing for a well-balanced image.
Working with Natural Elements
Nature is unpredictable, and sometimes you’ll have to work with what you’re given. Here are some tips for adapting to different natural elements:
1. Clouds
Clouds can be your best friend or your worst enemy in landscape lighting photography. They can diffuse harsh sunlight, creating soft and even lighting during the day. However, an overcast sky might lack drama. Be patient and wait for breaks in the clouds to add interest to your shots.
2. Wind
Wind can be a challenge when photographing landscapes, especially if you’re using long exposures. Use a sturdy tripod and consider using heavier gear bags or weights to stabilize your setup. Additionally, be prepared to shield your camera from blowing sand or rain.
3. Rain
While rain can be an inconvenience, it can also provide unique opportunities for creative photography. Raindrops on foliage or wet pavement can add a captivating dimension to your images. Just be sure to protect your gear with appropriate covers.
4. Fog
Fog can create a mystical and ethereal atmosphere in your photos. Embrace the moody ambiance and use it to your advantage. Experiment with different compositions and focal lengths to capture the essence of the foggy scene.
Long Exposure Photography
Long-exposure photography is a technique that can elevate your landscape lighting shots to a whole new level. It involves using a slow shutter speed to capture movement and create dreamy, flowing effects. Here’s how to do it:
1. Use ND Filters
To achieve long exposures in bright daylight, you’ll need an ND filter. This darkens the scene, allowing you to use slower shutter speeds without overexposing the image. Start with a 6-stop ND filter and adjust as needed.
2. Choose Your Subject
Long exposures work well with subjects that have movement, such as flowing water, moving clouds, or swaying trees. Experiment with different subjects to see what produces the most compelling results.
3. Set Up Your Camera
Mount your camera on a sturdy tripod and attach your ND filter. Switch to manual mode and select a small aperture (high f-number) for a larger depth of field. Start with a low ISO setting and adjust your shutter speed to achieve the desired effect.
4. Use Bulb Mode
In some cases, you may need to use the bulb mode on your camera. This allows you to manually control the duration of the exposure by holding the shutter open for as long as you want. Use a remote shutter release for precise timing.
5. Experiment and Review
Long-exposure photography is all about experimentation. Take multiple shots at different exposure times to see what works best. Review your images on the camera’s LCD screen and make adjustments as needed.
Post-Processing for Stunning Landscapes
Post-processing is the final step in creating stunning landscape lighting pictures. While it’s essential to get the best shot possible in-camera, a bit of editing can enhance your images further. Here are some post-processing tips:
1. Use Editing Software
Invest in a good photo editing software like Adobe Lightroom or Photoshop. These tools offer a wide range of editing options and allow you to fine-tune your images.
2. Adjust Exposure and Contrast
Start by adjusting exposure and contrast to ensure that your image has the right balance of light and dark areas. Use the histogram as a guide to prevent overexposure or underexposure.
3. Enhance Colors
Boost the saturation and vibrance of colors to make your landscapes pop. Be cautious not to overdo it, as overly saturated colors can look unnatural.
4. Sharpen and Reduce Noise
Apply sharpening to enhance the details in your image. Use noise reduction to eliminate any graininess, especially in low-light shots with high ISO settings.
5. Crop and Straighten
Crop your image to remove any distracting elements or to improve the composition. Use the straighten tool to correct any horizon lines that may not be level.
6. Create a Signature Style
Developing a consistent editing style can help your photos stand out and become recognizable to your audience. Experiment with different presets and adjustments to find a style that suits your vision.
Conclusion
Capturing the beauty of landscape lighting is a rewarding and awe-inspiring endeavor. With the right gear, composition techniques, exposure settings, and a bit of post-processing magic, you can create landscape lighting photos that truly showcase the wonder of nature. Remember that practice makes perfect, so don’t be discouraged by initial setbacks. Embrace the process, learn from your experiences, and let your passion for photography shine through in every shot you take.
Frequently Asked Questions
Q1: Can I capture beautiful landscape lighting photos with just a smartphone?
Yes, you can! Many smartphones today come equipped with high-quality cameras and various photography apps that can help you capture stunning landscape lighting photos. While a dedicated camera may offer more control and flexibility, don’t let the absence of one discourage you from exploring this art form.
Q2: How can I deal with changing lighting conditions during a shoot?
Changing lighting conditions can be challenging, but being prepared is key. Monitor the light and adjust your camera settings accordingly. Consider using exposure bracketing to capture a range of exposures that you can later blend in post-processing. Additionally, be patient and wait for the right moments when the lighting is ideal.
Q3: What’s the difference between the golden hour and the blue hour?
The golden hour occurs during the first hour after sunrise and the last hour before sunset. It is characterized by warm, soft, and diffused light that creates a golden glow. The blue hour, on the other hand, takes place shortly before sunrise and after sunset. It is named for the deep, cool, and almost surreal blue hues that dominate the sky during this time. Both hours offer unique lighting conditions for landscape photography, allowing you to evoke different moods in your photos.
Q4: Do I need to invest in expensive camera equipment to take great landscape lighting photos?
While high-end camera equipment can offer advantages in terms of image quality and flexibility, it’s not a requirement for capturing great landscape lighting photos. Many photographers have created stunning images with basic cameras or smartphones. The most important factors are your understanding of photography techniques and your ability to work with natural light and compositions effectively.
Q5: What’s the best way to improve my landscape lighting photography skills?
Improving your landscape lighting photography skills takes time and practice. Here are some tips to help you get better:
- Study the work of renowned landscape photographers for inspiration.
- Join photography communities or workshops to learn from others.
- Experiment with different locations, compositions, and lighting conditions.
- Critique your own work and seek constructive feedback from others.
- Continuously educate yourself about photography techniques and editing software.
- Stay patient and persistent, as mastering landscape photography is a journey.