
Learning about aperture, ISO, and shutter speed is key to taking your photography skills to the next level. These three camera settings, known as the “exposure triangle,” determine how much light enters the camera and creates the photograph. Mastering the exposure triangle allows you to control the look of your images and improve the quality of your photos. In this beginner’s photography guide, I’ll explain what aperture, ISO, and shutter speed are, how they work together, aperture iso shutter speed table and provide tips for choosing the optimal settings.
What is Aperture?
The aperture refers to the size of the opening in the lens through which light enters the camera. The aperture is measured in f-stops – the larger the f-stop number, the smaller the aperture. Aperture controls the amount of light entering the camera, but more importantly for photography, it also controls depth of field.
Depth of field refers to the area in front of and behind the subject that appears sharp. A large aperture (small f-stop number) decreases the depth of field, blurring the background. A small aperture (large f-stop number) increases the depth of field, bringing more elements in the photo into focus. For example, an aperture of f/1.8 will produce a shallower depth of field with a blurred background compared to f/8.
Here are some tips for working with aperture:
- For landscape photos, use a small aperture (high f-stop number) to get everything in focus from front to back. Start with f/11 or f/16.
- For portraits, a large aperture (low f-stop number) like f/2.8 or f/4 helps separate the subject from a nicely blurred background.
- Each time you close down the aperture one stop (going from f/2.8 to f/4), the amount of light entering the camera is cut in half.
- Most lenses have an aperture range of around f/1.4 to f/22. Very fast lenses may open up to f/1.0 or f/1.2 for more background blur.
- It’s hard to get everything in focus with apertures wider than f/1.4. Stop down for critical sharpness.
The aperture controls the depth of field and the appearance of backgrounds in images. Use wide apertures for blur and small apertures when you need everything sharp.
Aperture ISO Shutter Speed Table
| Aperture | ISO | Shutter Speed | When to Use |
| f/1.4 – f/2.8 | 100-200 | 1/125 sec | Portraits with blurred background |
| f/4 – f/8 | 100-400 | 1/250 – 1/500 sec | General use, some background blur |
| f/8 – f/11 | 100-800 | 1/250 – 1/1000 sec | Landscapes, macro, minimal background blur |
| f/16 – f/22 | 100-200 | 1/60 – 1/125 sec | Landscapes with large depth of field |
| f/2.8 – f/4 | 1600-3200 | 1/500 – 1/1000 sec | Action/sports freezing fast motion |
| f/8 – f/16 | 100 | 1 – 2 sec | Long exposures with a tripod |
What is ISO?
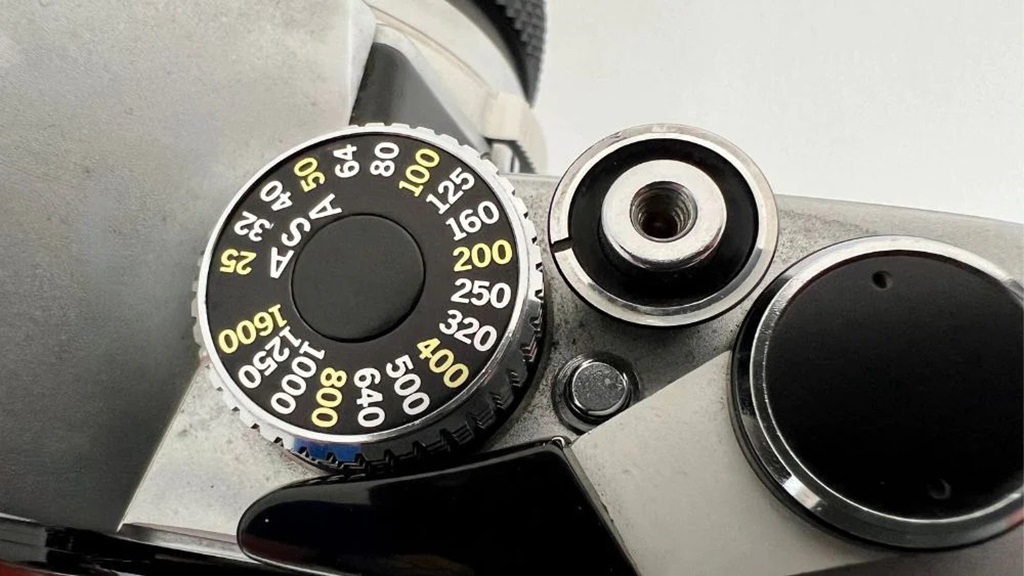
The ISO setting determines how sensitive your camera’s sensor is to light. A lower ISO number means the sensor has low light sensitivity, while a higher ISO number increases the sensor’s sensitivity to light.
Increasing the ISO allows you to shoot in darker conditions without having to decrease the shutter speed, but it also introduces noise and grain to the image. Lower ISO settings result in cleaner images.
Here are some tips for working with ISO:
- Use the lowest native ISO of your camera for optimal image quality – typically ISO 100 or 200.
- Increase the ISO when you need faster shutter speeds or smaller apertures in low light.
- Higher-end cameras can use fairly high ISOs like 1600 or 3200 and still produce usable images.
- For cameras with more image noise at high ISOs, try to stay below ISO 800 when possible.
- If your images are coming out too dark at the base ISO, consider adding light instead of just cranking up the ISO.
- Use high ISOs strategically. You can increase ISO for action shots to allow for faster shutter speeds to freeze motion.
- The higher the ISO you use, the more color and contrast editing you’ll need to offset the increased noise and flatness.
So ISO impacts how bright or dark your photo will be, and higher ISOs allow shooting in lower light. But watch out for increased noise at higher ISOs.
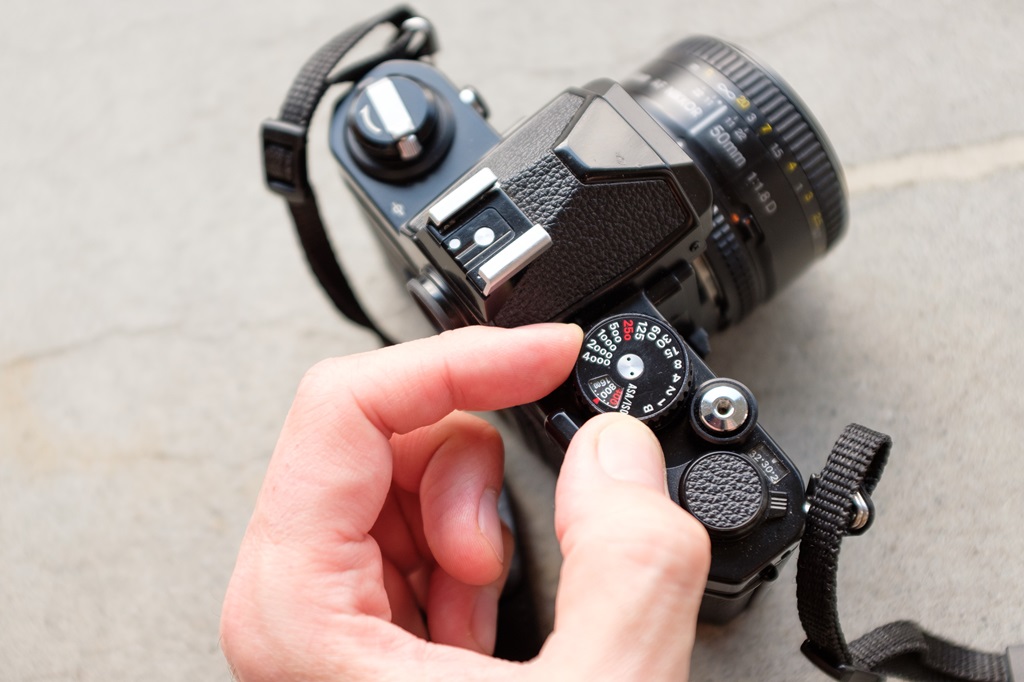
What is Shutter Speed?
The shutter speed refers to how long the camera’s shutter remains open as the picture is being taken. Shutter speed is measured in fractions of a second – for example, 1/125 sec or 1/1000 sec.
The shutter speed controls the total amount of light captured and also determines whether moving subjects appear sharp or blurred. A fast shutter “freezes” motion, while a slow shutter creates motion blur.
Here are some tips for selecting shutter speed:
- For handheld shots, don’t use a shutter speed slower than the reciprocal of your lens’ focal length. For example, with a 50mm lens, use 1/50 sec or faster.
- To freeze fast action, use shutter speeds of 1/500 sec or quicker.
- For portraits, a shutter speed of around 1/125 sec works well to avoid motion blur.
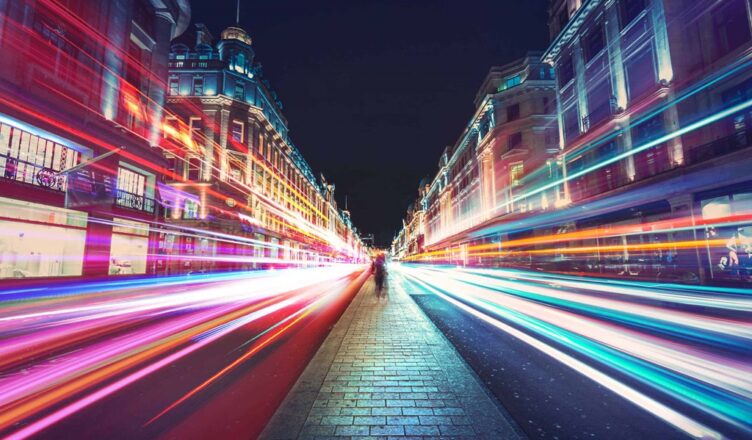
- For long exposures of flowing water or car light trails, use speeds of 1/2 sec or longer. You’ll need a tripod.
- If there’s a camera shake visible in your photos, increase the shutter speed. Use image stabilization if your lens offers it.
- Shutter speed and aperture work together. As you change one, you need to adjust the other to maintain proper exposure.
- Some cameras have an electronic or silent shutter option for quieter shooting. This uses a faster shutter speed.
The right shutter speed can make or break certain photos, like freezing action. But it also needs to balance with the aperture you want for depth of field. Get the speeds right, and your images will be sharp and well-exposed.
Putting the Exposure Triangle Together
Now that you know how aperture, shutter speed, and ISO impact your images, it’s time to put them together. Here are some tips for balancing these settings:
- Identify the most important factor for your photo – depth of field, motion blur, shutter speed, etc. Then, adjust the other settings to work with that priority.
- Use the lowest ISO possible for maximum image quality, and only increase it when needed to achieve proper exposure.
- In bright light, use a fast shutter speed and mid to small aperture. In low light, use a wide aperture and a slower shutter.
- When handholding, watch your shutter speeds. Faster than 1/focal length for sharpness.
- For static scenes like landscapes, aperture choice drives depth of field. Shutter speed can be flexible.
- Get a baseline exposure using auto mode on your camera, then switch to manual and refine from there.
- Using semi-automatic modes like aperture priority or shutter priority simplifies starting points.
- Changing one setting requires compensating with the others. This is where equivalent exposures come in handy.
Equivalent exposures provide flexibility in setting your exposure triangle. If one combination of settings yields a good exposure, other combinations that amount to the same total light can work too.
Overall, start by prioritizing one setting that best suits your subject, then adjust the other two around it. Experience and experimentation will teach you how different exposures impact your photos.
Example Photos and Settings
Let’s look at some example photos and the exposure triangle settings used to create them:
Landscape with Deep Depth of Field
For landscapes, you typically want as much of the scene in focus as possible. That requires a small aperture like f/16. I used ISO 100 for maximum image quality, then adjusted the shutter speed to 1/125 sec for proper exposure.
Aperture: f/16 ISO: 100 Shutter Speed: 1/125 sec
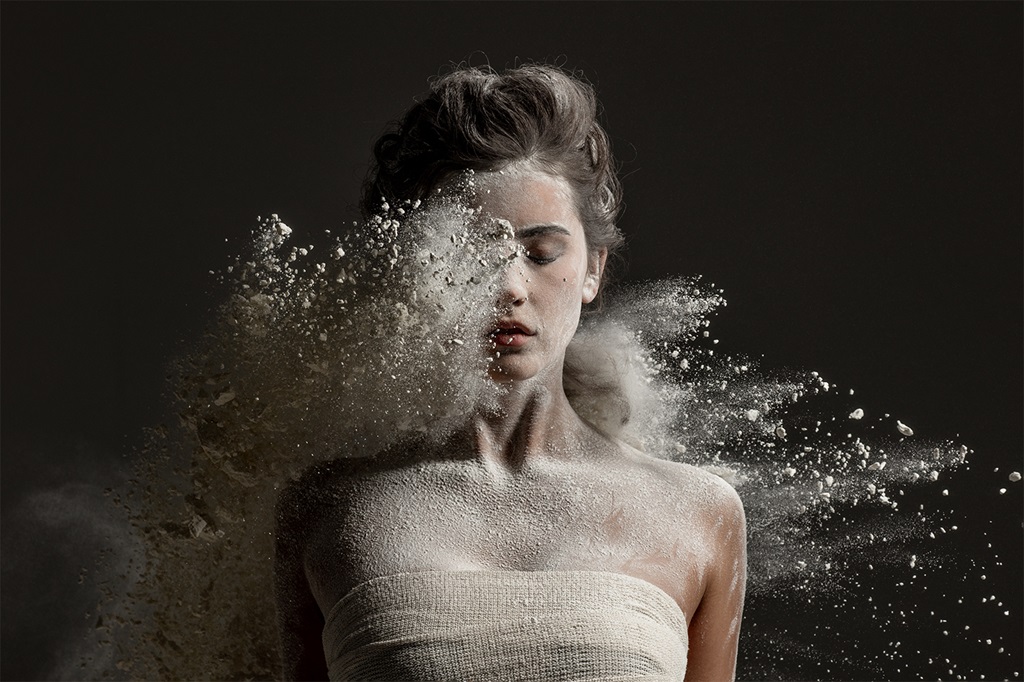
Portrait with Blurred Background
For portraits, large apertures around f/2.8 are ideal for blurring the background. I used ISO 200 and a shutter speed of 1/250 sec. The fast shutter ensured no camera shake, even when handheld.
Aperture: f/2.8 ISO: 200
Shutter Speed: 1/250 sec
Freezing Motion
To freeze a fast-moving subject like a bike in motion, use a fast shutter speed. My settings were f/8, ISO 400, and 1/1000 sec. The higher ISO allowed a faster shutter speed than if I used ISO 100.
Aperture: f/8 ISO: 400 Shutter Speed: 1/1000 sec
Motion Blur
To intentionally blur motion, use a slower shutter. For this flowing river, I dragged the shutter for 1 full second. I stopped down to f/22 for more depth of field and used ISO 100.
Aperture: f/22 ISO: 100 Shutter Speed: 1 sec
Studying real-world examples like these and then practicing on your own helps train your brain to see light and motion. Before long, you’ll know instinctively how to dial in the right settings.
Shooting Modes
Many cameras include pre-set shooting modes that automatically select aperture, shutter speed, and ISO settings for you. Here’s an overview:
Full Auto: The camera chooses everything based on the scene. It is a good option for beginners getting started.
Portrait: Large aperture for blurred background.
Landscape: Small aperture for large depth of field. Low ISO.
Sports: Fast shutter speed to freeze action. Higher ISO. Continuous focus.
Night: Low shutter speed and high ISO for low-light handheld. Tripod recommended.
Aperture Priority: Manually choose the aperture; the camera selects the shutter speed.
Shutter Priority: Manually choose the shutter speed, and the camera selects the aperture.
Manual Mode: Manually select the aperture, shutter speed, and ISO. Gives you full control.
Program Auto: The camera chooses aperture and shutter speed, but you can easily shift combinations.
These modes serve as helpful starting points or shortcuts when getting started. I’d recommend shooting in aperture priority when seeking a certain depth of field and shutter priority when needing to control motion blur. The manual gives complete control but requires more camera expertise.
Metering
In addition to the exposure triangle, metering mode impacts how your camera calculates the exposure. Metering refers to how the camera measures the light in the scene.
The most common modes are:
Evaluative Metering: The camera meters different zones of the frame and combines them for exposure. This works well for general use.
Center-Weighted Metering: Meters the entire scene but puts more emphasis on the central area. It can be used for portraits.
Spot Metering: Only meters a very small portion of the scene, about 2-5% of the frame. It is useful when high contrast would throw off general metering.
Partial Metering: Meters about 6-10% of the center of the frame. Provides more precise metering than evaluative.
Matrix Metering: Advanced metering found on higher-end cameras. It uses a very high-resolution grid to determine the best exposure.
Get to know your camera’s metering modes and how to override or lock exposure as needed in difficult lighting. Metering works hand in hand with setting the exposure triangle.
Equivalent Exposures
While there are countless potential combinations of aperture, shutter speed, and ISO, many different settings end up producing essentially the same exposure. Understanding equivalent exposures provides flexibility.
For example, if your exposure is f/5.6, ISO 200, 1/250 sec, here are other equivalent exposures mixing up the settings:
- f/8, ISO 200, 1/125 sec
- f/11, ISO 400, 1/250 sec
- f/16, ISO 400, 1/500 sec
As you adjust one setting (aperture for depth of field for instance), you can offset it by changing the ISO and/or shutter speed to arrive at a similar exposure. This gives you creative flexibility when the scene calls for it.
With experience, you’ll intuitively learn which equivalent exposures fit your creative needs. Until then, don’t be afraid to experiment!
Other Camera Settings
A few other camera settings impact your photos and require some knowledge:
White Balance – Adjusts color cast of the light source. Use auto white balance or set custom white balance for mixed lighting.
Drive Mode – Single shot, burst shooting, timer delay. Helpful for action, self-portraits, etc.
Focus Settings – Single, continuous, manual focus. Choose a focus point and track sensitivity.
HDR – Combines multiple exposures for high dynamic range. Useful for high-contrast scenes.
Exposure Compensation – Manually override metering to brighten or darken the exposure.
Learn when and how to leverage these settings along with the exposure triangle for full creative control. Don’t rely on auto mode forever!
Conclusion and Summary
Let’s recap what we covered about shutter speed, aperture, and ISO:
- Aperture controls light intake and depth of field – use wide apertures for blurred backgrounds and small apertures to get everything in focus.
- Shutter speed handles motion blur and exposure. Faster speeds freeze action, while slow speeds intentionally blur motion.
- ISO affects light sensitivity and image noise. Use the lowest native ISO for clean images and only go higher when needed.
- Balance these three when shooting in manual mode based on your priorities for the image. Equivalent exposures provide flexibility.
- Take advantage of semi-automatic modes like aperture priority when learning to prioritize depth of field.
- Metering mode impacts how your camera calculates optimal exposure in difficult lighting.
The exposure triangle takes practice but gives you creative control over your images. Learn these aperture iso shutter speed table fundamentals thoroughly and your photography will vastly improve. Now get out there, be deliberate with your settings, and capture stunning photos!
Frequently Asked Questions
What are some standard aperture settings I should know?
Common apertures photographers use include f/1.4, f/1.8, f/2, f/2.8, f/4, f/5.6, f/8, f/11, f/16, and f/22. f/1.8-f/4 offers background blur, f/8 is a moderate aperture, and f/16-22 provides a large depth of field.
Should I prioritize aperture or shutter speed?
If your priority is controlling the depth of field and background blur, the aperture should be your starting point. If the freezing or blurring motion is most important, start with shutter speed.
How do I choose an ISO?
Use the lowest native ISO of your camera (typically 100 or 200) as your default for the cleanest images. Only increase ISO when you need faster shutter speeds or smaller apertures in lower light situations.
Why are my photos too bright or too dark?
Adjust your exposure settings to let in more or less light. A dark photo needs a slower shutter speed, wider aperture, or higher ISO. A bright photo requires the opposite adjustments.
How do I know which settings to use in manual mode?
Start in an automatic or priority mode, then switch to manual and refine the settings based on the metering and your creative priorities. Equivalent exposures provide leeway.